Making Word Documents Accessible & Effective

Check the items below to ensure that your Word documents are accessible and usable by all students on different platforms.
Tip for Mac Users
Choose Ribbon from the View menu - this will provide an interface similar to those shown in the instructions below.
- Use Properly Formatted Headings to Structure Word Documents
- Select the text to mark as a heading
- Select the home tab from the Word menu
- In the styles group, choose the appropriate heading level (see the next section on the proper way to order headings)
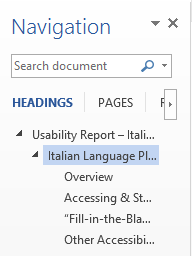
- Order Headings to Form a Logical Outline of the Document
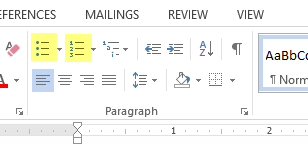
- Create True Bulleted and Numbered Lists
- Select the text to mark as a list
- On the Home tab, in the Paragraph group, select the Number or Bullets list icon.
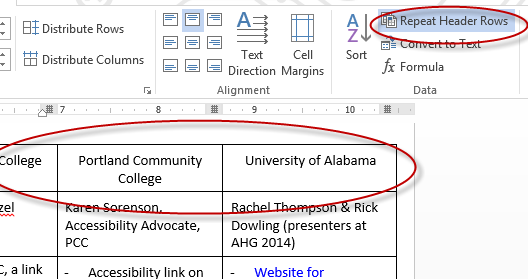
- Use Column Headers for Tables
- Move the cursor to the top row of the table
- Select the layout tab
- Select repeat header rows. (Tip: you can select more than one row as a header. All rows will repeat on each page).
- Provide Alternative Text for Images
- Right click on the image or use cntr + mouse click if are using a one-button mouse on a Mac.
- Select “format picture” and the “layout & properties" option.
- Enter the alternative text into the description area and not the title field.
- Use a Font that is Easy to Read
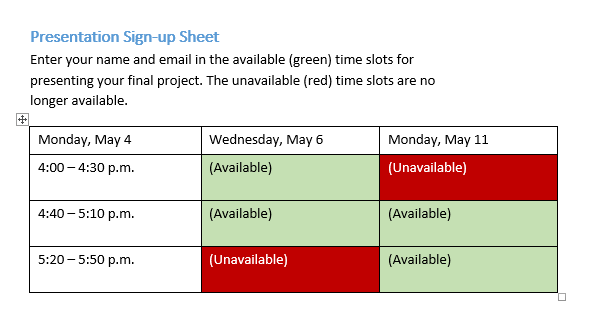
- Do Not Convey Information by Color Alone
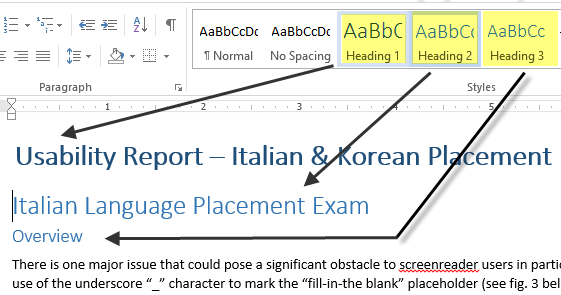
Designate headings through styles in Word instead of relying on visual cues only, such as: large font size, color, boldness, etc. Properly structuring a page with headings provides important navigation cues to blind users who use screenreaders (devices which read screen content verbally) and provides a navigation structure for all uses within the Word document.

Step-by-step Instructions
The title of your document should be a heading 1. Section or page headings should be designated heading 2 and sub-headings heading 3 and so on. Try not to skip heading levels.
Use the formatting features of Word instead of using spacebar or tab to emulate structure. Similar to headings, properly formatting lists provides additional information and orientation to the screenreader user. Editing and adding to lists is also much easier when they have been formatted as actual lists.
Step-by-step Instructions
Screenreaders read the column headers in Word tables as the user moves across a row, providing orientation and context for the data in the cell. Column headings also provide orientation for the visual user by repeating column headers on each page.
Step-by-step Instructions
For every non-text element such as images, charts or graphs, provide a concise (100 characters or less) description of the information conveyed by the image.
Step-by-step Instructions
.png)
Use a sans-serif font of at least size 12 for general readability and to ensure accessibility for students with vision impairments. Sans-serif fonts, such as Arial, Helvetica or Verdana, are considered easier to read on the computer and will magnify well for those with low vision.
If conveying information by color also provide a means aside from color for individuals who are blind or color blind and to provide multiple cues to all users.